Summary
- Deconstructing the Fall Bulk Dilemma: Silhouette Physics and Proportional Balance
- Mistake 1: Competing Crewnecks That Crowd the Clavicle (Fix: Staggered Neckline Depths)
- Mistake 2: Bulky Drop-Shoulder Sweaters Under Tailored Armholes (Fix: Armhole Gusset Clearance)
- Mistake 3: Exterior Belting Over Lofty Knitwear (Fix: Mid-Layer Waist Anchoring)
- Mistake 4: Uniform Hemlines Ending at the Widest Hip Point (Fix: Cascading Three-Inch Hemline Drops)
- Mistake 5: Stacking Multiple Heavyweight Wool Weaves (Fix: Calibrated GSM Weight Gradient)
- Mistake 6: Concentrating Sleeve Volume at the Wrist Joint (Fix: Stepped Cuff Revealing the Forearm)
- Mistake 7: High-Contrast Horizontal Waist Splits (Fix: Monochromatic Inner Base Column)
- Mistake 8: Coiling Heavy Blanket Scarves Around the Clavicle (Fix: Elongated Vertical Shawl Drape)
- Mistake 9: Chunky Cable Turtlenecks Trapped Under Structured Lapels (Fix: Fine-Gauge Merino Under Notch Collars)
- Mistake 10: Slouchy Raglan Sleeves Stuffed into Padded Structured Shoulders (Fix: Matching Shoulder Seam Geometry)
- Mistake 11: Compounding Heavy Fabric Around the Ankle and Boot Shaft (Fix: Cropped Hem with Clean Shaft Transition)
- The Structural Layering Matrix: Calibrated Clearances, Weight Ratios, and Hemline Offsets
- The Strategic Silhouette Blueprint: Assessing Proportions Before Leaving the Mirror
Deconstructing the Fall Bulk Dilemma: Silhouette Physics and Proportional Balance
When autumn temperatures dip, piling on heavy sweaters often leads to bunched fabric around your torso, stiff armholes, and crowded necklines. True layering without bulk is about structural balance rather than arbitrary thermal stacking. By balancing fabric weights across your autumn capsule wardrobe and leaving space at key joints, you can build chic fall fashion that protects against chill while keeping fall layering outfits crisp and mobile.
Mistake 1: Competing Crewnecks That Crowd the Clavicle (Fix: Staggered Neckline Depths)
Stacking two identical ribbed crewnecks traps extra fabric right against your throat, creating an unintentional mock-neck roll that shortens your neck and crowds your collarbones. A practical neckline layering guide starts with staggering collar depths so each layer sits cleanly on its own plane. Aim for a minimum two-inch vertical drop between your inner and outer collar edges. Sliding a crisp white poplin collared shirt under sweater knits gives the base structure, letting the collar points spread flat instead of bunching upward.
For softer knitwear, try pairing a fine-gauge base under v neck knit styling or an open cardigan. Revealing a small sliver of skin at the clavicle hollow frames your upper torso and breaks up dense knit surfaces. When experimenting with chic autumn collars, keep collar edges separated by choosing necklines that step downward rather than competing for the exact same spot against your neck.
Mistake 2: Bulky Drop-Shoulder Sweaters Under Tailored Armholes (Fix: Armhole Gusset Clearance)
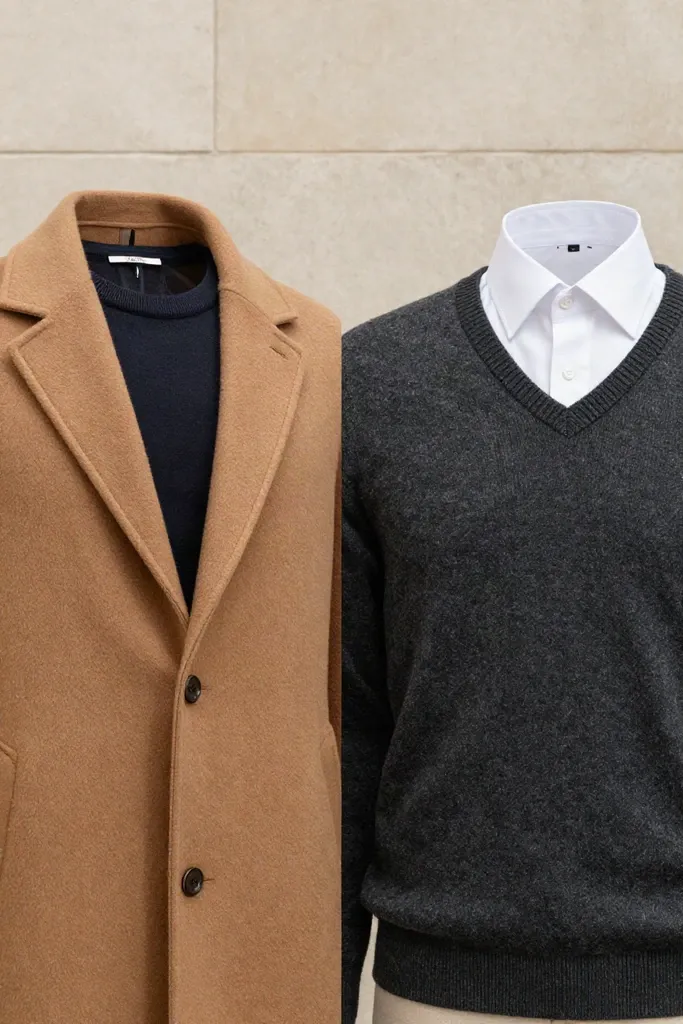
Stuffing a slouchy, low-seam knit into a structured coat creates heavy bunching beneath your underarm, forcing the chest canvas outward and restricting your arm movement. When following a reliable outerwear fit guide, shoulder seam geometry must align between inner and outer garments to prevent unsightly seam distortion.
- Check your coat armhole clearance by ensuring your outer jacket or camel wool overcoat offers at least 1.5 inches of ease below the natural armpit crease so fabric moves freely without binding.
- Apply a simple drop shoulder layering fix by matching seam construction: reserve dropped-shoulder knitwear for loose cocoon coats, while pairing tailored outer layers with set-in sleeves or diagonal raglan cuts.
- Test your sweater under tailored coat fit by raising both arms to shoulder height; if the coat chest pulls forward or puckers under the arm, switch to a finer knit gauge with a higher armscye.
Proper sleeve alignment preserves your natural shoulder slope and keeps your outer coat draping straight through the torso.
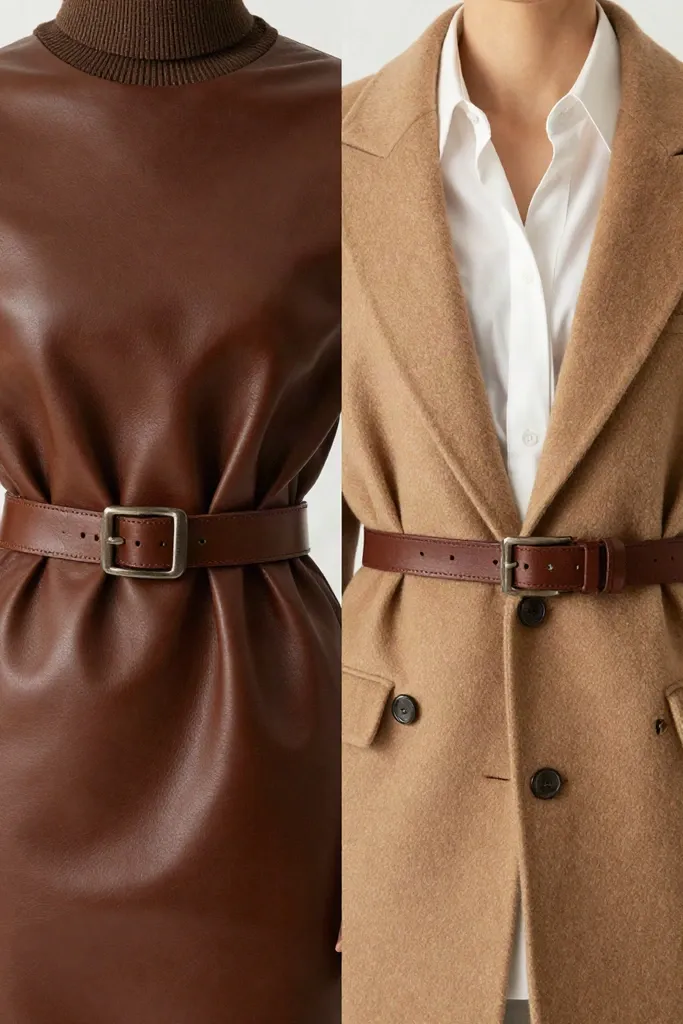
Mistake 3: Exterior Belting Over Lofty Knitwear (Fix: Mid-Layer Waist Anchoring)
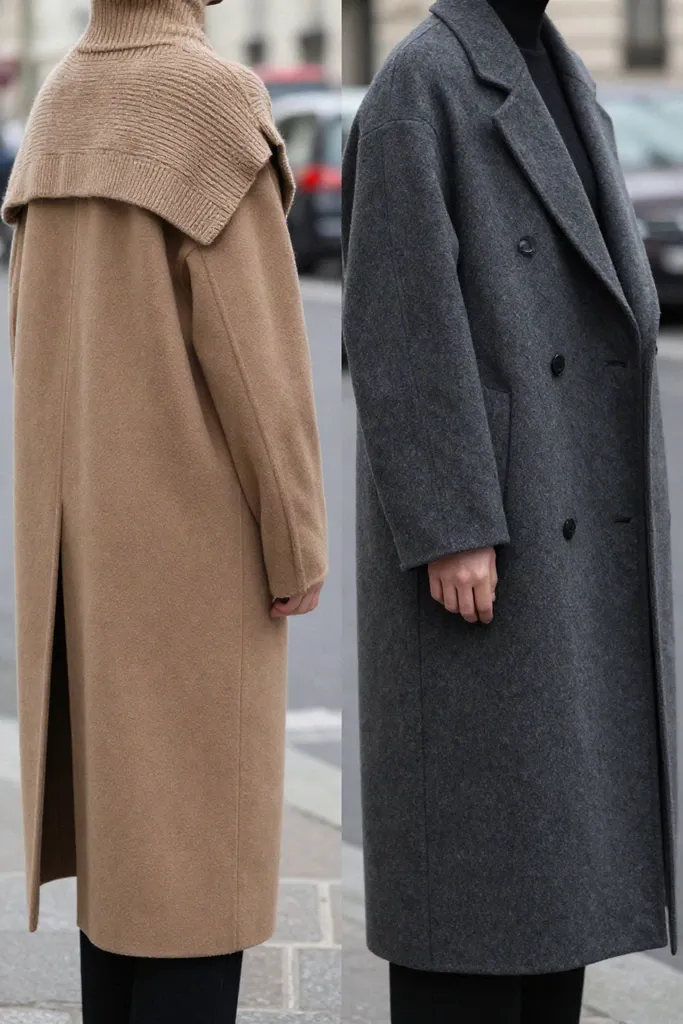
Fastening a stiff espresso leather belt directly over a heavy five-gauge ribbed cardigan forces the thick yarn to bulge above and below the strap, creating an unflattering mushroom puff around your midsection. Understanding how to belt knitwear requires shifting the cinch from the bulky exterior to an internal base layer. When you secure a slim belt over a tucked poplin shirt or lightweight jersey top, you establish clear waist definition for fall outfits without crushing dense wool fibers.
Leave your heavier knitwear or long coat unfastened over this secured base to create long, clean lateral lines that frame your torso. This method of cinched waist layering keeps the front profile lean while the unbelted outer layers move naturally around your hips. Unlike heavy exterior belted coat styling that bunches thick knit ribs into stiff folds, mid-layer anchoring preserves fabric integrity and keeps your proportions balanced.
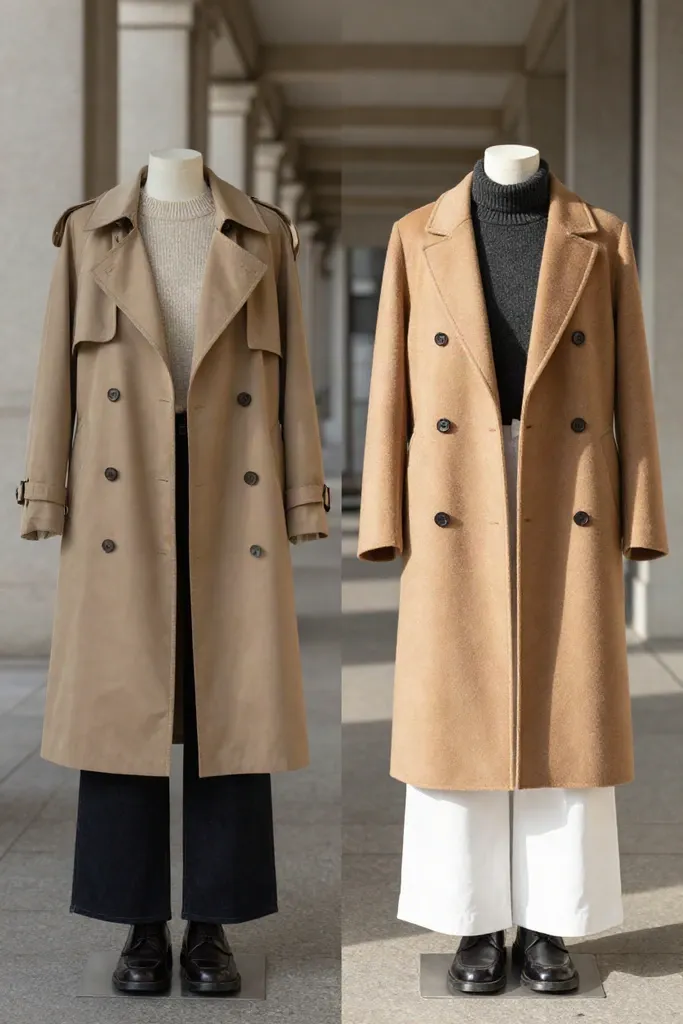
Mistake 4: Uniform Hemlines Ending at the Widest Hip Point (Fix: Cascading Three-Inch Hemline Drops)
When an inner cotton shirt, wool knit, and tailored jacket all cut off at the exact same horizontal band across your hip crest, fabric bulk stacks into an awkward ledge. This alignment creates a thick perimeter right where your body naturally needs fluid movement, making your lower torso appear unnecessarily broad. Adhering to proven hemline staggering rules eliminates this clutter by allowing each tier of fabric to drop smoothly past the layer resting beneath it.
- Establish your base foundation with a crisp poplin shirt or fluid jersey top that extends approximately three inches below your natural pelvic bone.
- Introduce your intermediate knit or tailored vest so its bottom edge lands slightly above or below that shirt boundary, keeping layered outfit lengths visually distinct rather than stacked.
- Complete the ensemble by verifying your jacket length proportions, selecting an outerwear piece that either rests cleanly at the mid-hip or sweeps past your thighs in deliberate staggered hemline styling.
This deliberate downward tiering draws the eye along a gentle vertical trajectory, keeping your pelvic profile smooth while letting each fabric edge breathe.
Mistake 5: Stacking Multiple Heavyweight Wool Weaves (Fix: Calibrated GSM Weight Gradient)
Piling a dense 450 GSM boiled wool cardigan beneath a heavy tweed coat produces an immovable armor that suffocates movement and widens your torso. When two heavyweight weaves sit against each other, their coarse yarn fibers catch and bunch, creating artificial bulk rather than warmth. Effective fabric weight layering relies on a density progression that builds insulation from whisper-thin foundations to solid outerwear shields. You achieve genuine thermal layering without bulk by distributing yarn densities across three distinct operational weights instead of doubling down on thick knits.
A sensible fall GSM layering approach organizes your clothing density from lightest to heaviest. Begin next to your skin with a 120 to 150 GSM base of silk or micro-rib modal to regulate heat without adding surface volume. Over that base, incorporate thoughtful merino wool layering around 220 to 300 GSM, which traps warm air between its fine fibers while maintaining flexible shoulder drape. You then finish with a 500 GSM double-faced wool overcoat that provides weather resistance and structural crispness, preserving a clean profile without stiff seams.
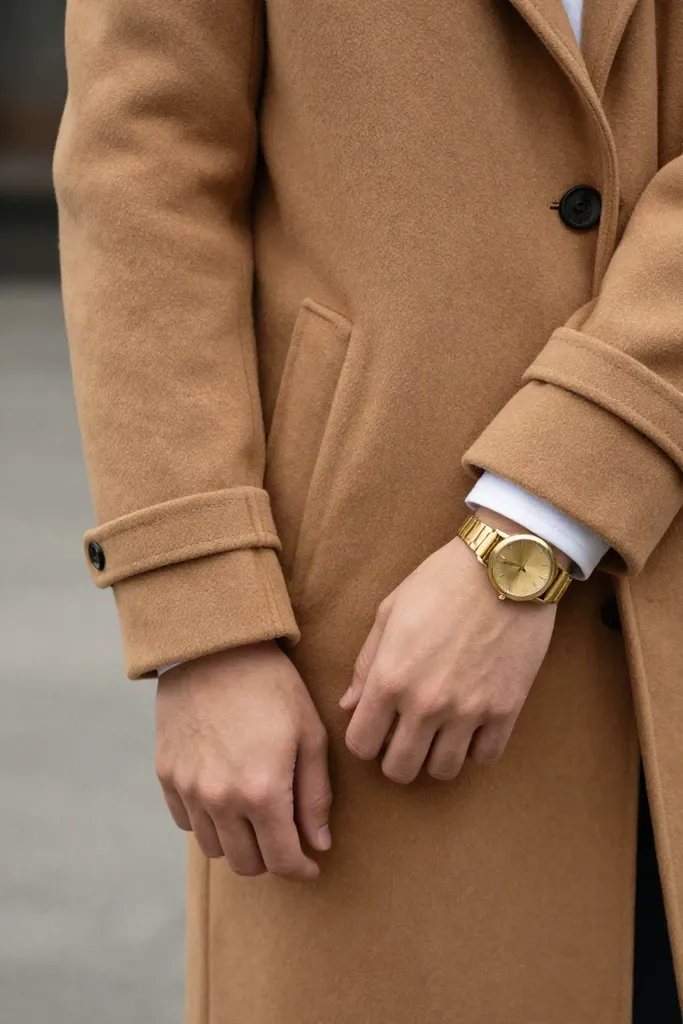
Mistake 6: Concentrating Sleeve Volume at the Wrist Joint (Fix: Stepped Cuff Revealing the Forearm)
Allowing a thick ribbed knit cuff, a cotton shirt sleeve, and a heavy wool coat hem to bunch together over your wrist joint instantly shortens the line of your arm. When dense fabrics pool around your hands, the silhouette loses definition and looks weighed down by excess cloth. Practicing precise sleeve cuff styling frees the wrist joint, exposing the narrowest point of the lower arm to restore balance against substantial autumn outer layers.
- Push your mid-layer knit sleeve two inches up your forearm so the ribbed band grips the flesh securely without squeezing.
- Turn back your shirting cuff into a crisp one-inch fold, letting the bright woven edge sit clean against your skin while framing your watch or jewelry in line with classic wrist proportion fashion.
- Slide your overcoat on and adjust the cuff line backward slightly, adopting rolled cuffs coat adjustments if necessary to anchor clean tailored sleeve layering throughout daily movement.
This visible slice of forearm gives the entire ensemble breathing room, transforming bulky arm fabric into a tidy, deliberate finish.
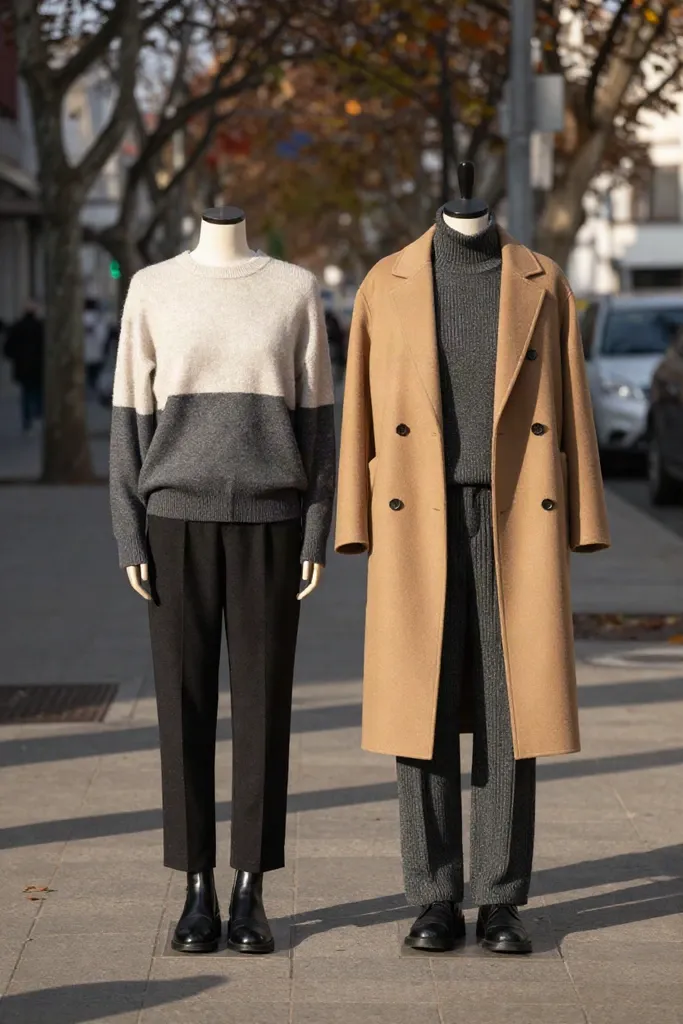
Mistake 7: High-Contrast Horizontal Waist Splits (Fix: Monochromatic Inner Base Column)
A bright white crewneck worn over dark espresso trousers creates a severe horizontal chop right across your midsection when your outer coat falls open. This high-contrast split pulls the viewer's gaze sideways, visually shortening your torso and magnifying the lateral drape of heavy outerwear. By implementing the classic column dressing method, you match your inner separates in continuous tonal shades, allowing the central axis of your body to read as one sleek, cohesive line.
- Charcoal melange foundations: Combine a fine-knit charcoal wool crewneck with matching pleated flannel trousers for a smooth, low-reflectance center that lets a camel overcoat float cleanly at your sides.
- Deep espresso pairings: Match a dark brown ribbed turtleneck directly to wool gabardine pants, utilizing vertical line styling to streamline your frame beneath a lighter trench or trench-style cardigan.
- Warm oat and ecru columns: Build a pale monochrome fall outfit using an ivory cashmere knit and ecru denim under a rich navy coat, creating a bright central vertical strip that avoids waistline fragmentation.
These coordinated tonal pairings represent one of the most reliable slimming layering techniques available, ensuring that heavy coats accentuate your stature rather than overwhelming your natural proportions.
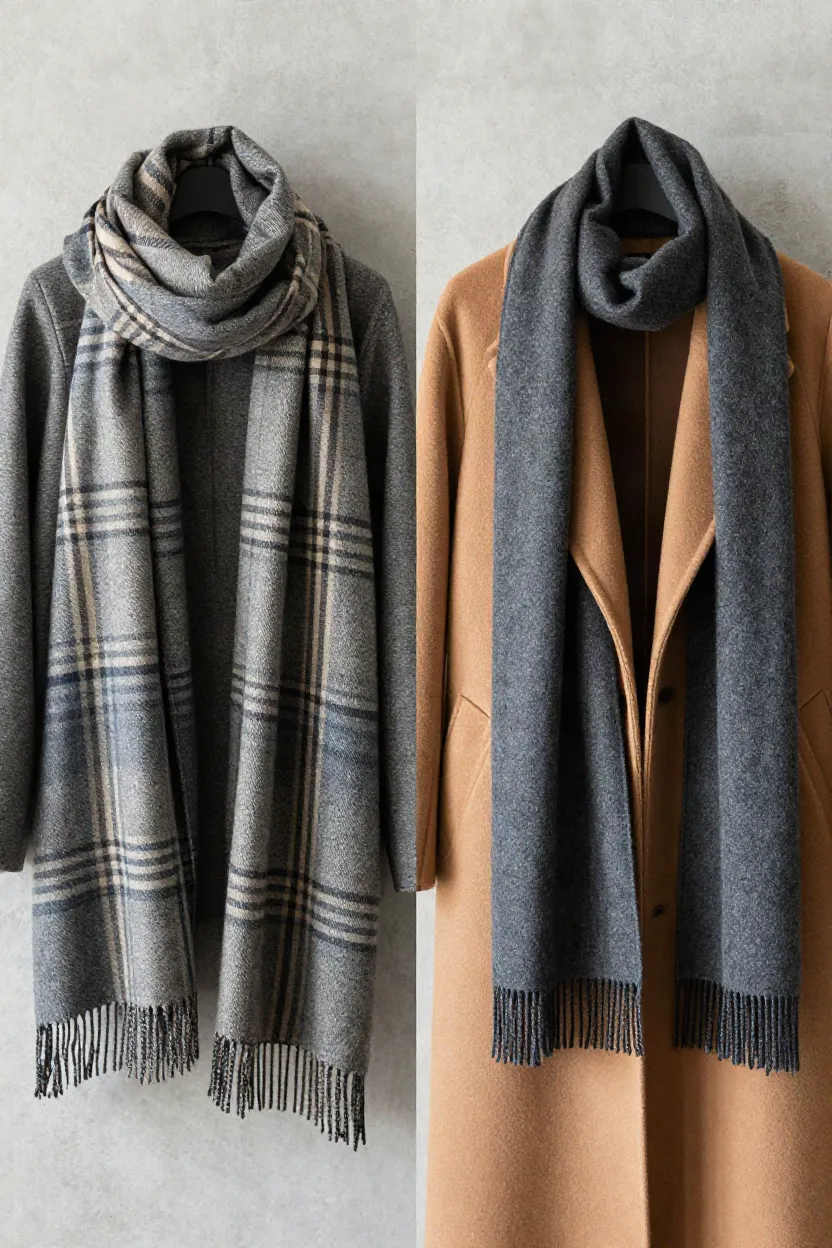
Mistake 8: Coiling Heavy Blanket Scarves Around the Clavicle (Fix: Elongated Vertical Shawl Drape)
Thick, oversized wraps coiled tightly around your neck crowd the jawline and completely bury the collar of your coat under excess yardage. Heavy acrylic knits create an artificial shelf beneath the chin, distorting head-to-shoulder proportions and adding visual weight right at the throat. When you focus on scarf styling without bulk, the goal shifts toward streamlining the collar area. A lightweight cashmere scarf drape allows the material to sit flat against your chest while letting your jawline remain distinct.
Smart techniques for how to wear fall scarves with tailored outerwear rely on gravity and clean lines. Instead of winding the length into a dense knot, let the ends hang straight down inside or directly over your lapels in a clean vertical scarf styling technique. Fine alpaca or woven cashmere scarves fall in parallel paths that guide the eye toward your sternum, mirroring the opening of a double-breasted coat and keeping the upper torso looking trim and balanced.
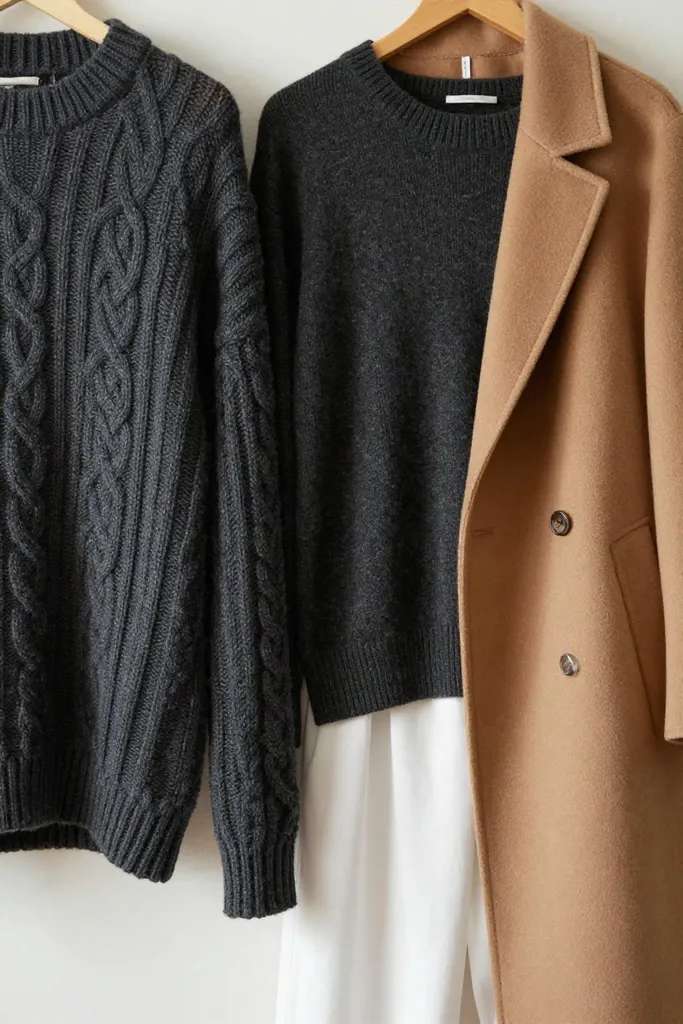
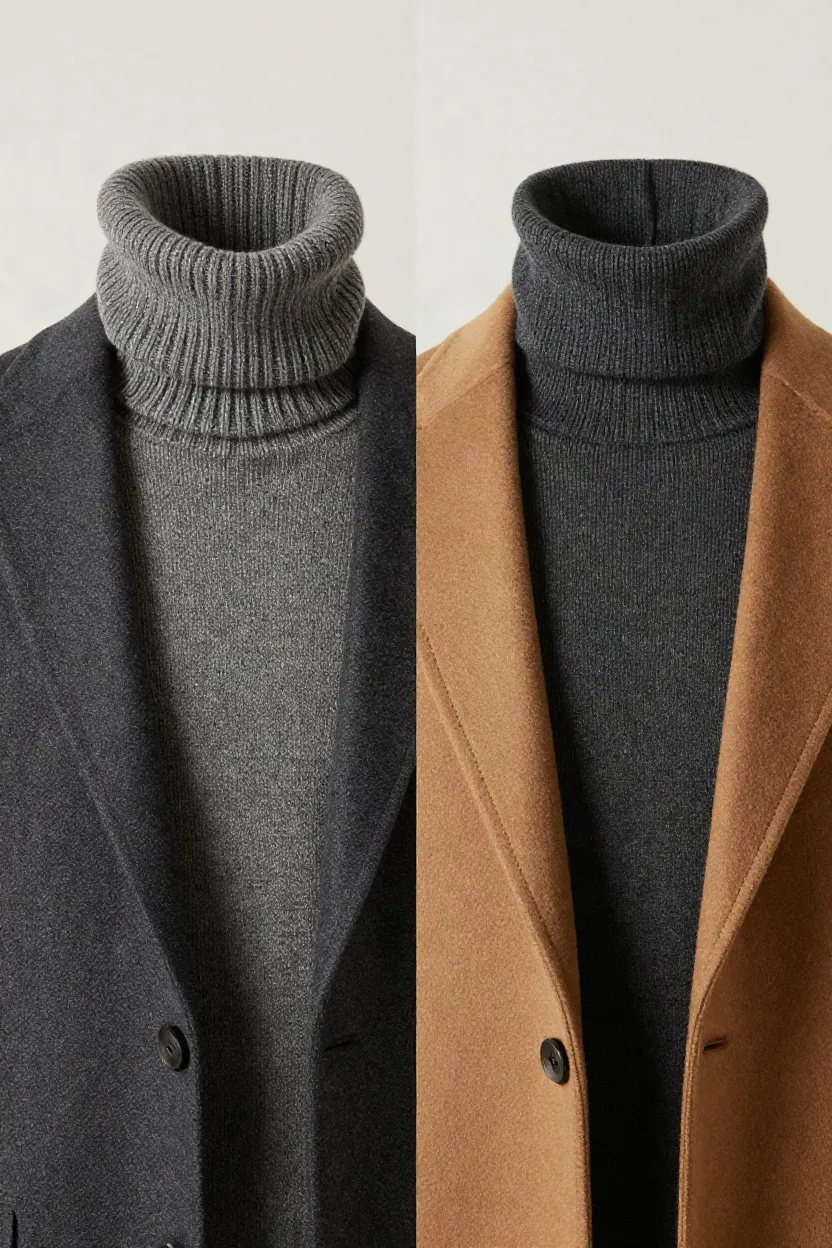
Mistake 9: Chunky Cable Turtlenecks Trapped Under Structured Lapels (Fix: Fine-Gauge Merino Under Notch Collars)
A thick cable-knit sweater worn under a tailored jacket creates mechanical resistance against the interior chest canvas, pushing the collar outward and causing lapels to buckle. Heavy knitwear requires room to expand, while structured wool jackets rely on a flat, flush foundation across the chest. To maintain a crisp tailored lapel fit throughout cold weather, you need to match yarn thickness to the interior space of your jacket.
- Assess the jacket structure before dressing: reserve chunky three-gauge knits for roomy coats or unstructured cardigans that accommodate thick ribs without pulling at the armholes.
- Select fine gauge knitwear such as a sixteen-gauge merino wool or silk-cashmere blend to wear as your primary underlayer, allowing the fabric to glide smoothly against internal canvas linings.
- Assemble chic turtleneck outfits by tucking the neck roll neatly beneath the collar stand, ensuring the lapel facings lie flat against your collarbone when buttoning a turtleneck under blazer combination.
This deliberate shift in yarn weight eliminates chest distortion and preserves the clean front lines of your tailoring all season long.
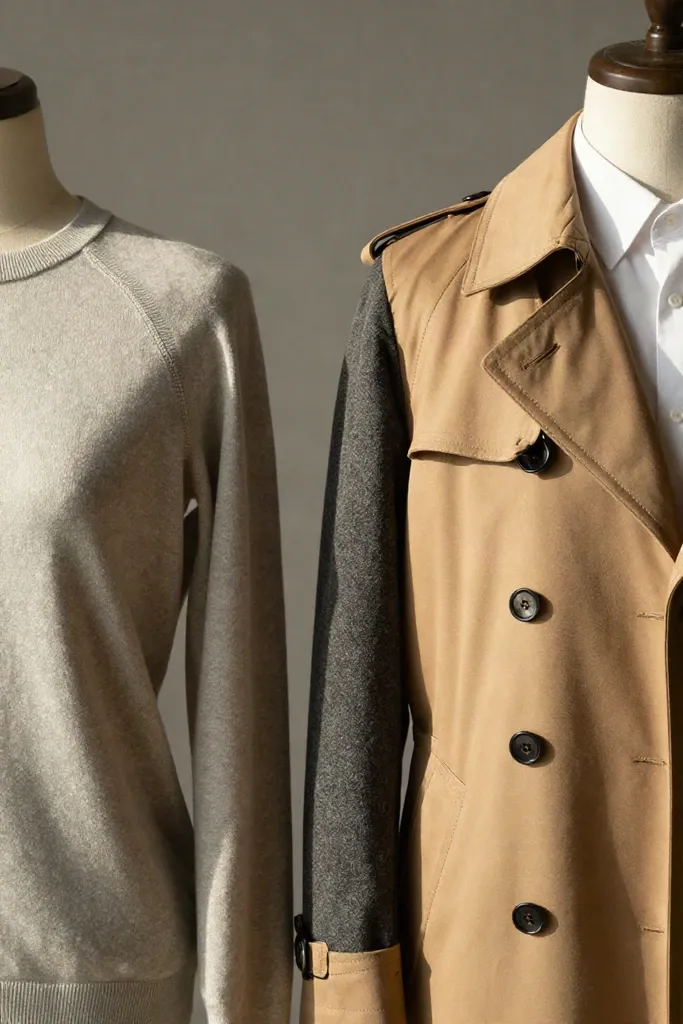
Mistake 10: Slouchy Raglan Sleeves Stuffed into Padded Structured Shoulders (Fix: Matching Shoulder Seam Geometry)
Garments with conflicting shoulder seams produce unsightly ridges of bunched fabric right over the deltoid. When the diagonal cut of a relaxed raglan sleeve is shoved into a rigid tailored jacket with built-in shoulder pads, the excess underarm fabric has nowhere to settle, creating awkward bumps beneath the wool shell. In my fitting sessions, aligning seam geometry between inner and outer pieces makes the difference between an uncomfortable upper arm pinch and a smooth silhouette.
- Coordinate set-in knits under structured tailored coats to keep the armhole seams resting squarely on the edge of your natural shoulder bone for structured shoulder layering.
- Pair relaxed raglan sweaters with dropped-shoulder cocoon coats or unconstructed wraps, giving the soft diagonal fabric full freedom to drape naturally without meeting rigid internal padding.
- Evaluate the raglan vs set in sleeve distinction during dressing, ensuring the outer armhole cut sits slightly deeper than the inner knit to prevent bunching around the armpit.
Proper shoulder seam alignment safeguards the crisp lines of your tailored coat fit and ensures your arms move freely without fighting the fabric.
Mistake 11: Compounding Heavy Fabric Around the Ankle and Boot Shaft (Fix: Cropped Hem with Clean Shaft Transition)
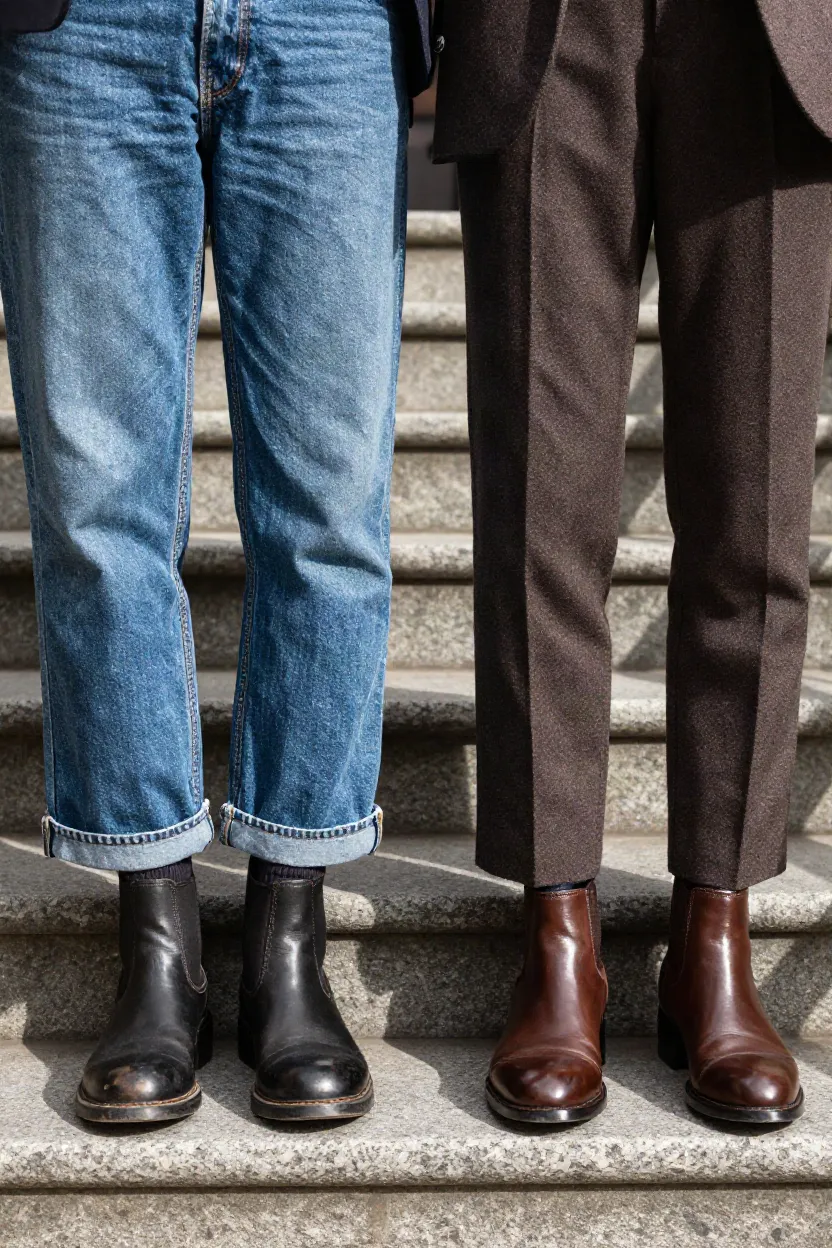
Heavy wool trouser hems and thick ribbed socks piled directly over stiff leather boot shafts create a dense block of fabric at the floor. When wide or straight trousers lack vertical clearance, the fabric catches on boot pull tabs or stiff leather rims, creating accordion ripples that pull attention downward. Establishing a clean shaft transition ensures that your lower leg maintains crisp definition beneath long coats and substantial knitwear.
- Select trousers with a dedicated pant hemline break that grazes the top of the footwear, or opt for a cropped length that leaves a half-inch clearance above the collar.
- Coordinate your trouser hem with ankle boots by pairing straight cuts with close-fitting glove boots, letting the pant leg fall in a clean vertical path over the leather.
- Refine your fall boot outfit proportions by swapping thick wool socks for smooth fine-gauge hosiery under straight pants to prevent fabric friction at the ankle joint.
Thoughtful fall ankle boot styling standards keep the base of your outfit crisp, preventing hem bunching and stabilizing your layered look from the ground up.
The Structural Layering Matrix: Calibrated Clearances, Weight Ratios, and Hemline Offsets
Establishing exact physical clearances between each fabric layer removes the guesswork from cold-weather dressing. When you treat fabric density and spacing as a practical layering measurement guide, your clothes move naturally with your body rather than bunching at friction points.
- Neckline step: Maintain a minimum 2-inch drop between your inner shirt collar and outer knitwear edge so each rim rests flat against your skin.
- Armhole allowance: Ensure a minimum 1.5 inches of ease around the bicep and underarm seams according to reliable garment clearance benchmarks.
- Material density: Follow a balanced fabric weight matrix starting with a 120 to 150 GSM cotton base, moving to a 220 to 300 GSM knit, and finishing with a 450 to 600 GSM wool outer coat.
- Hemline drop: Step each hem by 2.5 to 3.5 inches, creating a clear proportional styling guide that prevents horizontal bulk around your hips.
These measured spacing increments protect your fabrics from premature friction while retaining warmth without unnecessary bulk.
The Strategic Silhouette Blueprint: Assessing Proportions Before Leaving the Mirror
Before you step outside, run a focused three-point check in front of a full-length mirror to verify how your layers sit together. Turn sideways to check total profile thickness across your midsection, raise your elbows to test armhole mobility, and look straight ahead to confirm that long vertical seams stay uninterrupted. This quick routine serves as your practical fall styling checklist, proving that sophisticated cold-weather dressing depends on precise seam geometry and balanced fabric combinations rather than piling on extra garments. Reliable silhouette assessment tips applied at the mirror prevent fabric crowding before you leave home.
You can treat this daily evaluation as an efficient capsule wardrobe audit for your seasonal rotation. When every piece in your closet leaves sufficient room around the shoulders and falls in staggered lengths, you reach a dependable minimalist layering verdict that keeps your profile sharp throughout the day. A wardrobe built around clean structural benchmarks ensures you stay warm without sacrificing ease of movement.